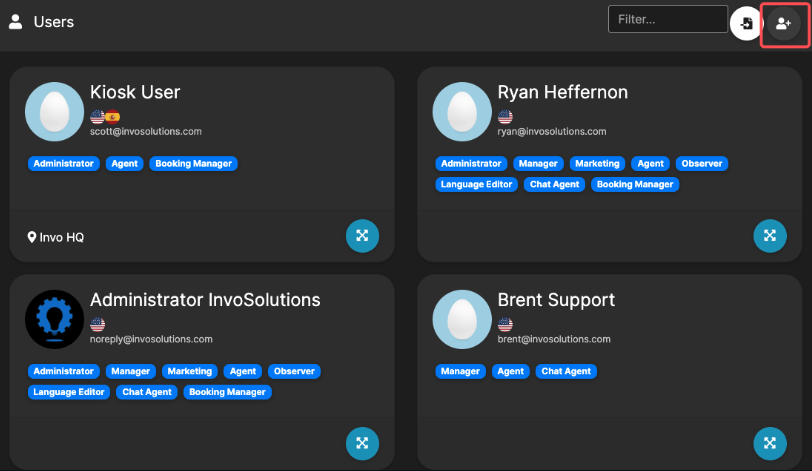
Users
Setting Location: Admin > Users
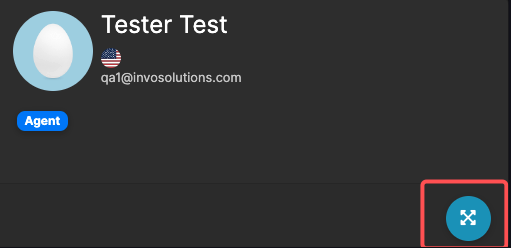
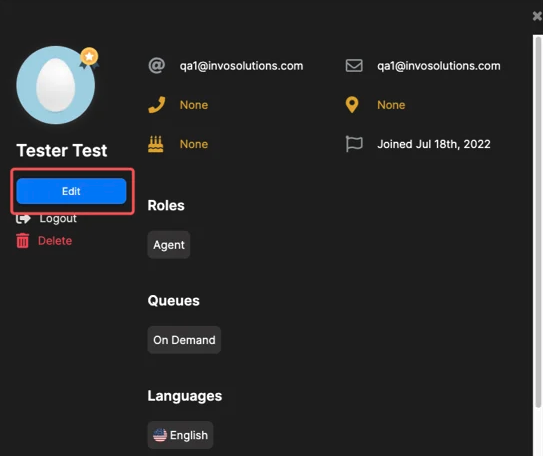
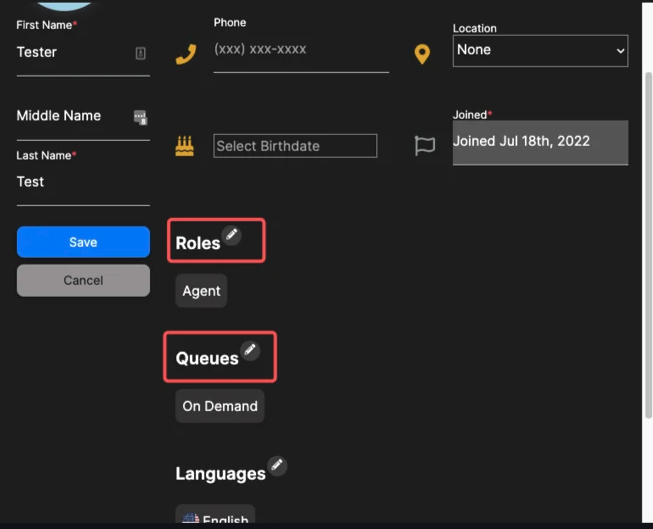
You can click on the Add button in the top right side of the menu to add a new user. Each user will need to be assigned a role, as well as Queues to be able to answer a call.
Roles
Admin:
- Able to view Monitor page
- Able to create and assign clients through Concierge
- Able to control Marketing
- Access to Admin settings
- Edit location details
- Edit languages
- Edit/Create Kiosks
- Edit/Create Queues
- Edit/Create Users
- Edit Settings
- Edit Translations
- Edit OAuth
- Edit Verbiage Modification
- Able to view Reporting
- Access to Chatbot settings, interaction history, and process manager
- Access to support, logs, and documentation
Manager:
- Able to view Monitor page
- Able to create/manage booking appointments
- Able to create and assign clients through Concierge
- Able to view Reporting
Agent:
- Able to create, and answer video banking calls
- Able to create/manage booking appointments
- Able to create and assign clients through Concierge
- Able to answer and takeover chats from Chatbot
- Able to view Monitor page
- Able to view Reporting
Booking Manager:
- Able to create/manage booking appointments
- Able to create and assign clients through Concierge
- Able to view Reporting
Chat Agent:
- Able to create, and answer video banking calls
- Able to create and assign clients through Concierge
- Able to answer and takeover chats from Chatbot
- Able to view Reporting
Marketing:
- Able to create and assign clients through Concierge
- Able to control Marketing
- Able to view Reporting
- Access to Chatbot interaction history and process manager
Observer:
- Able to view Monitor page
- Able to create and assign clients through Concierge
- Able to view Reporting
Language Editor:
- Able to create and assign clients through Concierge
- Able to view Reporting
Locations
Setting Location: Admin > Locations
Locations are necessary for Invo Kiosks, Invo Concierge, and Invo Booking. You can group locations that are close to each other into Regions.
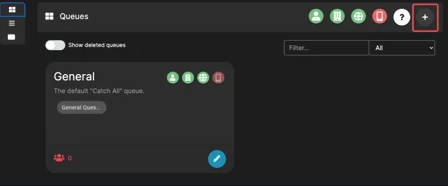
Queues
Setting Location: Admin > Queues
Queues are on the backend for routing purposes and how calls reach your Agents. An example might be Mortgages. Your Mortgage queue would only have Mortgage Agents assigned to it, and your Auto Loans queue would only have those specific Agents assigned. Mortgage Agents would not see Auto Loans calls, and vice versa.
You can control which channel(s) will route to specific queues as well. For example, you might only want Mortgages to be answered In Person or from a Kiosk, but General Answers can be accepted across all four channels (if applicable.)
Answers
Setting Location: Admin > Queues
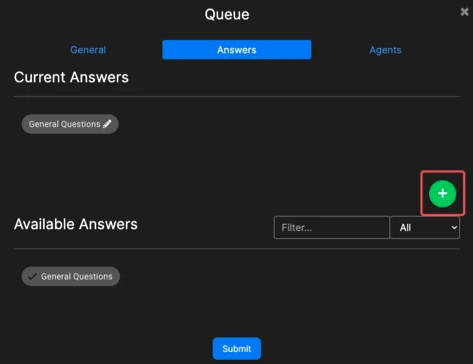
Answers are client facing, and what will be displayed on your client facing channels as options for your clients to select.
Answers are located within the Queues menu, by clicking the pencil button. 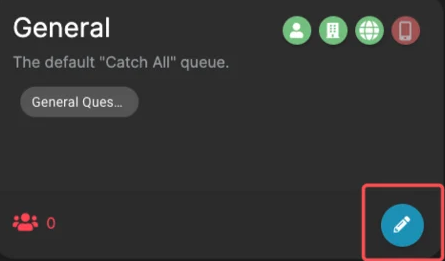
Within the Answer menu, you can edit the name, assign an image or an icon from Invo's selection, and select which channels the Answer displays. You can directly assign it to a Queue, and if you also have Invo Booking enabled, you can determine if the Answer will be able to be scheduled and the duration of the appointments. To create a new Answer, click on Answers within the Queues menu, and click the plus sign.
Settings
Setting Location: Admin > Manage Settings >
Settings that are in bold are most important to address.
There are additional settings that you can customize your experience and tailor your preferences to best suit your needs. All settings are located in the Admin menu, under Manage Settings. In the left hand column, you can ignore everything under Core settings for now. Invo will configure General Settings as well as the Scheduled Tasks, your Mailer settings will be configured under the Booking module, and Branding and Document Signing are listed above to be configured. Highlighted below are recommended settings to configure.
App Settings
Dashboard and MonitorNotifications
Default Call Ringtone - If you prefer to use your own audio file for call notifications, you can upload that here.
Disclaimer: We recommend keeping this tone under a five second duration.
Default Chat Ringtone - If you prefer to use your own audio file for chat notifications, you can upload that here.
Disclaimer: We recommend keeping this tone under a five second duration.
*Persistent Ringing - By default, new call notifications ring once. Enable this option to have the audible ringing notification continue until the call is answered.
Ring new call on dashboard - This enables calls to ring while on the dashboard tab
Ring new calls on monitor - By default, notifications are disabled on the monitor tab. Enable this setting to hear call notifications on the monitor tab.
Ring new chat on dashboard - This enables new chat alerts to ring on the dashboard.
Ring new chat on monitor - By default, notifications are disabled on the monitor tab. Enable this setting to hear new chat alerts on the monitor tab.
Post-call Wrap Up Time - If your client has ended the call, your agent can remain in the call if they need more time to wrap up. At the end of that time, the server will automatically end the call.
*Allow outbound call - This allows agents to send out invites to client to join a call. See the Testing page for more info.
*Default QA for outbound calls - This will specify which queue your outbound call is coming from.
Dashboard and Monitor
Dashboard
Active User Display Style - This only applies if you would like to use our Legacy dashboard design. Component will place your agent profiles on the right hand side of the page. Row will place them in a row at the top of the page.
Default call ordering control - You can select if this is based on waiting time, or by priority. Priorities can be set when you create a location.
Show calls on dashboard filtered by - You can select if you'd like your calls to be filtered by either queue answer, or by queue.
Agent-chat availability - This allows the ability to chat with the client while in a call.
Visibility Roles - This will configure which role has access to view the monitor page. Default roles: admin, manager, agent, observer. (Note: This is a super admin setting, so please submit a ticket here if you'd like this changed from the default.)
Finished Call Visibility - This will configure which role has access to view previously finished calls on the monitor page. Default roles: admin, manager.
Internal Chat - Enable to allow your agents to chat with each other.
- Is group chat enabled? - Allow your agents the ability to invite other agents into a single chat window.
Internal Chat User Access - This will configure which role has access to use internal chat. Default roles: admin, manager, agent. (Note: This is a super admin setting, so please submit a ticket here if you'd like this changed from the default.)
Client In Call Chat - This will configure which communication channels you would like to allow the ability for your agents to chat with your clients. Default channels: web, mobile.
Display typing events - This allows for the chat participants to see real-time typing activity from other participants.
Web Channel
Enable External QA - This will allow the placement of an external URL on your web landing page. When enabled, a widget will appear in the right hand column to manage your links.
*URL to agreement policies - This will configure the website agreement that your clients will need to accept (via checkbox) when they provide their contact information before starting a call.
*Enable note field for clients - This will enable a notes field to allow your clients to provide more information about the reason for their interaction.
*Is email required? - Require an email address for the contact information form.
*Is phone number required? - Require a phone number for the contact information form.
Line information - Enable to show the number of calls in line. (Note: this is per queue. This does not display the total number of clients waiting in line. Only the number of clients waiting for that specific queue.)
Display Survey - This allows for a survey to display immediately following a finished call. If this setting is disabled, a dialog box will appear asking if user would like to complete the survey.
Calls related
*Agent can share their screen - This allows your agents the ability to share their screen with your clients.
*Client side screen sharing - This will allow your clients the ability to share their screen with your agents. (Note: this is only for the web channel.)
Can wave hand - This allows your clients ability to notify your agents that the client is ready to come off of being on hold.
Video stream watermark - This displays a watermark of your logo during the interaction.
Enable Guest Invitation - This allows the ability for your agents to invite a client to a call using email or SMS. (Note: this is a super admin setting due to necessary configuration for SMS.)
QR File Transfer
File Transfer - Enabled Channels - This configures which channels will allow file transfer. Default channels: all
*File Transfer - Allowed upload mime types - This configures which file types will be allowed for file transfer. Default types: none (This will need to be configured upon enabling the feature.)
File Transfer - Max file upload size - maximum file sized allowed to be uploaded. Default size: 32mb (This is a super admin setting. Please submit a ticket here if you'd like this changed from the default.)
*File Transfer: Preferred extension for uploaded images - Default extension: jpeg
Next steps:
Test a web call. Learn how to create a video banking call by clicking here.