With Invo Kiosks, your employees can answer calls from a centralized location, walk customers through complex financial transactions, and complete them with document capture and electronic signature technology. This is the digital touchpoint in your physical locations, bridging personalized connection between your agents and customers.
Hardware
Click here to view current recommended hardware.
A typical Invo Kiosk will consist of the following hardware:
- PC
- Monitor
- Keyboard
- Mouse
- Document Camera
- Signature Pad
Invo does not recommend dual monitors for a kiosk, as this could cause issues with the video stream.
It is your organizations responsibility to collect and configure the Kiosk hardware. If you have Invo Concierge, the Kiosk can be configured to removed client control, and the keyboard could be removed. The Concierge will place the client into the kiosk and in the queue, removing the need to enter information on a keyboard. A mouse will still be required in order to potentially use Invo Browse, and sign documents depending on your workflow.
Installation
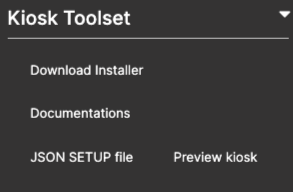
The kiosk installer is located within your environment(s), under Admin > Manage Settings> Kiosks (left hand column). On the right side of the page, you'll find the Kiosk Toolset.

Here, you can download the installer, as well as Documentation, upload the JSON file, or Preview the kiosk which will assist you with styling during the customization step.
Once the install is complete, you can begin setup.
- Click Start for Manual Setup

- The Server's base URL is the URL of the environment you'd like this Kiosk to connect to. You can use your Staging URL to test, or Production if you're ready for the kiosk to be live.

- You will need to provide administrator credentials to allow the software access to the environment.
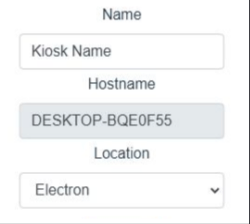
- Name your Kiosk to identify it in Invo Core. The hostname will be prepopulated with the device's PC name. The location will need to be selected based on which branch the Kiosk will be located in.

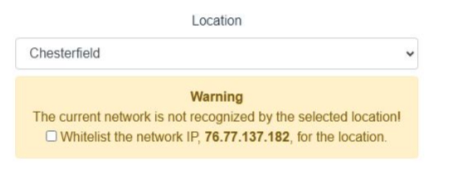
- For security reasons, a kiosk would be banned from the system if it is not connected to a network registered for its associated location. During the installation of the kiosk,the program will pull the public IP of the network and check if it is already in the array of registered IP addresses of the chosen location. If the pulled IP is not in the array, the program will warn and give us the ability to register the unregistered IP, if needed.

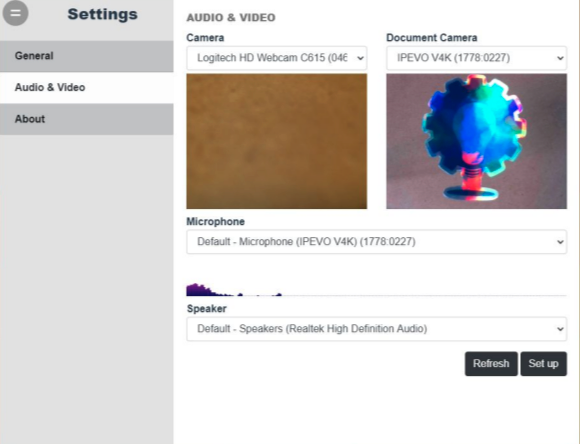
- Configure your kiosk peripheral devices.

- Setup is now complete.
Installation Video
NOTE: Documents scanned by the document camera are temporarily stored on the server during the call. When the call is complete, those documents are then deleted.
When you opt to download the documents, these are downloaded to the default download location of your browser.
