invo-logo-white
Home Configuration Testing Support Walkthrough Concierge Kiosk Booking
Invo_Products_Core_White

Configuration


Configuration needs to be done within your Staging environment.  You can access your Staging environment by going to https://pelicanstatecustaging.invosolutions.com/login.  The /login is employee side.  To test placing a call on the client side, you would visit https://pelicanstatecustaging.invosolutions.com (no /login.) 


We have already added the Users that were invited to your kick off call. 


We have created the following Queues for you to begin testing:

  • General
  • Lending
  • Mortgages
  • New Accounts

Users

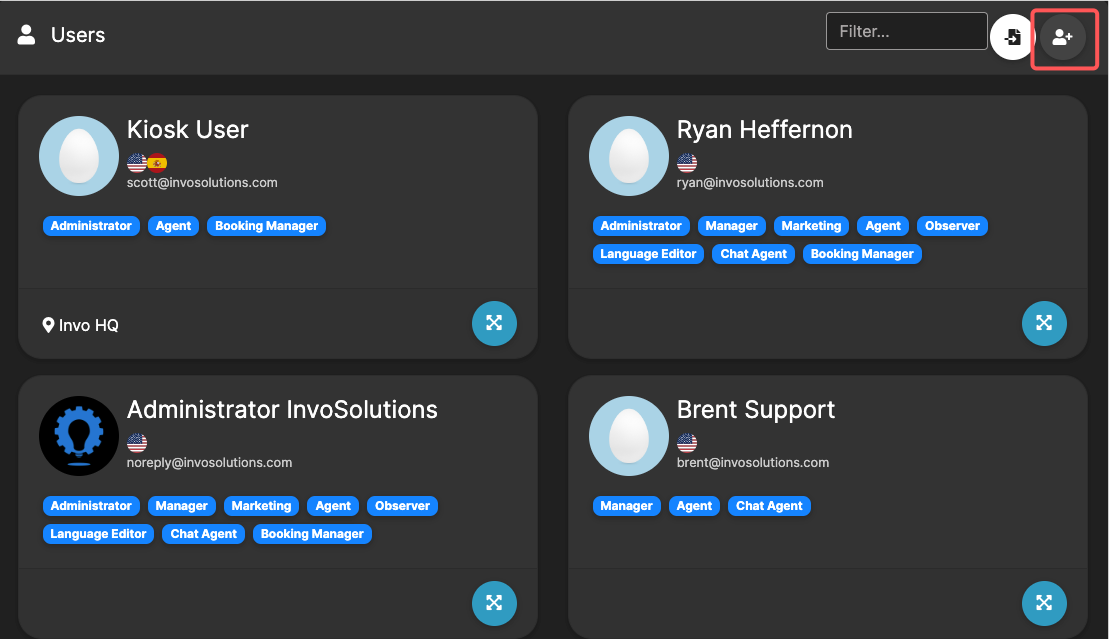
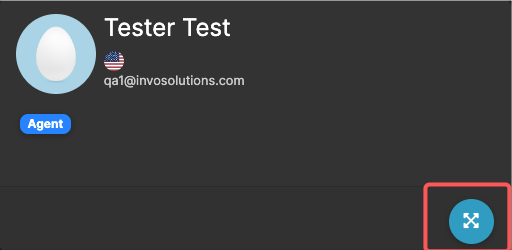
We have added Users to the system who's names and email addresses we previously had. Please add anyone else to the system you would like to have access. The Users menu is listed under Admin > Users. You can click on the Add button in the top right side of the menu to add a new user.  Each user will need to be assigned a role, as well as Queues to be able to answer a call. 

image.png


Locations

We have added Locations based off of your website.  Locations are necessary for Invo Kiosks, Invo Concierge, and Invo Booking.  Please review and add any additional locations as needed. You can also group locations that are close to each other into Regions. This menu can be found under Admin > Locations.

image.png

Queues

Queues are on the backend for routing purposes and how calls reach your Agents. An example might be Mortgages.  Your Mortgage queue would only have Mortgage Agents assigned to it, and your Auto Loans queue would only have those specific Agents assigned.  Mortgage Agents would not see Auto Loans calls, and vice versa.  You can control which channel(s) will route to specific queues as well. For example, you might only want Mortgages to be answered In Person or from a Kiosk, but General Answers can be accepted across all four channels (if applicable.) This menu is located under Admin > Queues.

image.png

Answers

We have setup the following Answers for you:

  • General Questions
  • Personal Loan
  • Business Loan
  • Auto Loan
  • Home Loan
  • New Account

Answers are client facing, and what will be displayed on your client facing channels as options for your clients to select. Answers are located under Admin > Queues, and click the pencil button on a Queue.  Within the Answer menu, you can edit the name, assign an image or an icon from Invo's selection, and select which channels the Answer displays.  You can directly assign it to a Queue, and if you also have Invo Booking enabled, you can determine if the Answer will be able to be scheduled and the duration of the appointments.

image.png


image.png

Invo_Products_Marketing_Reports_White

These are under Marketing. Your ad campaigns will play while a client is queued for a call, or while the call is on hold. You will first need to upload Ads to be able to place them into Campaigns. Ads can be images, music, or video.

image.png

Once you begin editing your new Campaign, click and drag an ad into the campaign.

image.png


Settings

Max advertisement file upload size - Determines the file size limit for uploaded ads.  (Note: This is a super admin setting, so please submit a ticket here if you'd like this changed from the default.)

Ads Campaign Background - This will display in the background behind your ad.  Requires CSS styling.


Reports

Reports are located under the Reports tab.  We offer multiple ways of reporting, from reports provided by Invo, to creating your own custom report, Survey reporting, and Booking reporting.

You can report on the following criteria based on specific or all channels, locations, queues, and users:

Calls per day
Calls per hour
Calls per weekday
Calls per location
Calls per kiosk (if applicable)
Calls per employee
Calls per channel
Calls per queue
Calls per queue answer
Average Time at Branch
Average Lobby Wait Time
Average Call Time
Average Queue Wait Time
Average Call Hold Time


Settings

Use external survey - If you use a survey system, you can enable this setting and past the URL into the text field.

Users who can see full reports - This will configure what roles have the ability to see the full list of reports.  By default, users are only able to see reports of calls that they have ownership of.  Default roles: admin, manager

Allow customized chart colors - Enable to allow the option to choose a different color for reports.

Surveys

Surveys are added at the end of a call.  They can be assigned to a specific queue, or all of them.

Branding

Your branding information can be found under Admin > Manage Settings > Branding. We have taken the liberty of adding images based off what we found on Google, but these will need to be reviewed by your Marketing team. Branding images to review and edit.

Favicon - This is a small image that will appear in browser tabs.  The ICO format would be best suited for it, but it can be also JPEG or PNG. The recommended size is 16x16.  

Logo and Slogan
 

The logo is used almost everywhere in the platform to represent the FI. 

  • In the navigation bar 
  • The watermark shown on the video stream 

The Slogan is the long/big/more-detail version of the logo. If it is not defined, the system will use the Logo instead as a fallback option. The Slogan is used in: 

  • In the survey form 
  • On the web landing page 
  • On the booking status page 
  • On the document uploading page 

An image with a transparent background would be recommended. Your logo must stand out on dark/light backgrounds for our dark/light modes. See the images below:  


If your logo cannot stand out from one of those two backgrounds, it is recommended to add some color, shadow of backdrop into the background of the images. 

The recommended format is PNG. There is no constraint on the size or the resolution for those images. In general, for online purposes, your logo size should be under 200 KB. The larger your image file is, the heavier it is, which makes it more challenging for websites. 

Here are the standard measurements for the size of the logo: 

 
 Vertical layout: 

  • 160 x 160 

Horizontal layout: 

  • 250 x 150 
  • 350 x 75 
  • 400 x 100 

Welcome Image - This image will appear at the login page for your Agents.

Web Landing Portrait Image - This is an image that will appear on your client facing web page.  It is portrait orientation, and typically is either a logo, or a targeted advertisement.

Web Background - This can be a solid color, an uploaded image, or a URL.  This will be the entire background of your client facing web page.

User profile image - This image is typically either the users standard company photo, or an avatar image.

E-Signature/Docusign

Invo Core Settings

There are additional settings that you can customize your experience and tailor your preferences to best suit your needs.  All settings are located in the Admin menu, under Manage Settings.   In the left hand column, you can ignore everything under Core settings for now.  Invo will configure General Settings as well as the Scheduled Tasks, your Mailer settings will be configured under the Booking module, and Branding and Document Signing are listed above to be configured.


App Settings

Dashboard and Monitor
    • Notifications

Default Call Ringtone - If you prefer to use your own audio file for call notifications, you can upload that here.
Disclaimer: We recommend keeping this tone under a five second duration.

Default Chat Ringtone - If you prefer to use your own audio file for chat notifications, you can upload that here.
Disclaimer: We recommend keeping this tone under a five second duration.

Persistent Ringing - By default, new call notifications ring once.  Enable this option to have the audible ringing notification continue until the call is answered.

Ring new call on dashboard - This enables calls to ring while on the dashboard tab

Ring new calls on monitor - By default, notifications are disabled on the monitor tab.  Enable this setting to hear call notifications on the monitor tab.

Ring new chat on dashboard - This enables new chat alerts to ring on the dashboard.

Ring new chat on monitor - By default, notifications are disabled on the monitor tab.  Enable this setting to hear new chat alerts on the monitor tab.

Post-call Wrap Up Time - If your client has ended the call, your agent can remain in the call if they need more time to wrap up.  At the end of that time, the server will automatically end the call.

Allow outbound call - This allows agents to send out invites to client to join a call.  See the Testing page for more info.

Default QA for outbound calls - This will specify which queue your outbound call is coming from.


Dashboard and Monitor
    • Dashboard


Active User Display Style - This only applies if you would like to use our Legacy dashboard design.  Component will place your agent profiles on the right hand side of the page.  Row will place them in a row at the top of the page.

Default call ordering control - You can select if this is based on waiting time, or by priority.   Priorities can be set when you create a location.

Show calls on dashboard filtered by -  You can select if you'd like your calls to be filtered by either queue answer, or by queue.

Agent-chat availability - This allows the ability to chat with the client while in a call.

Visibility Roles - This will configure which role has access to view the monitor page.  Default roles: admin, manager, agent, observer.  (Note: This is a super admin setting, so please submit a ticket here if you'd like this changed from the default.)

Finished Call Visibility - This will configure which role has access to view previously finished calls on the monitor page.  Default roles: admin, manager.

Internal Chat - Enable to allow your agents to chat with each other.
 - Is group chat enabled? - Allow your agents the ability to invite other agents into a single chat window.

Internal Chat User Access - This will configure which role has access to use internal chat.  Default roles: admin, manager, agent.  (Note: This is a super admin setting, so please submit a ticket here if you'd like this changed from the default.) 

Client In Call Chat - This will configure which communication channels you would like to allow the ability for your agents to chat with your clients.  Default channels: web, mobile.

Display typing events - This allows for the chat participants to see real-time typing activity from other participants. 


Web Channel


Enable External QA - This will allow the placement of an external URL on your web landing page.  When enabled, a widget will appear in the right hand column to manage your links.

URL to agreement policies - This will configure the website agreement that your clients will need to accept (via checkbox) when they provide their contact information before starting a call.

Enable note field for clients - This will enable a notes field to allow your clients to provide more information about the reason for their interaction.

Is email required? - Require an email address  for the contact information form.

Is phone number required? - Require a phone number for the contact information form.

Line information - Enable to show the number of calls in line.  (Note: this is per queue.  This does not display the total number of clients waiting in line.  Only the number of clients waiting for that specific queue.)

Display Survey - This allows for a survey to display immediately following a finished call.  If this setting is disabled, a dialog box will appear asking if user would like to complete the survey.


Calls related

Agent can share their screen - This allows your agents the ability to share their screen with your clients.

Client side screen sharing - This will allow your clients the ability to share their screen with your agents. (Note: this is only for the web channel.)

Can wave hand - This allows your clients ability to notify your agents that the client is ready to come off of being on hold.

Video stream watermark - This displays a watermark of your logo during the interaction.

Enable Guest Invitation - This allows the ability for your agents to invite a client to a call using email or SMS.  (Note: this is a super admin setting due to necessary configuration for SMS.)


QR File Transfer

File Transfer - Enabled Channels - This configures which channels will allow file transfer.  Default channels: all

File Transfer - Allowed upload mime types - This configures which file types will be allowed for file transfer.  Default types: none (This will need to be configured upon enabling the feature.)

File Transfer - Max file upload size - maximum file sized allowed to be uploaded.  Default size: 32mb (This is a super admin setting.  Please submit a ticket here if you'd like this changed from the default.) 

File Transfer: Preferred extension for uploaded images - Default extension: jpeg